

When it comes to the world of home security technology, few things provide as much peace of mind as a Nest Camera. Nonetheless, even the most dependable devices can occasionally require a gentle push in the right direction. I’m here to demonstrate precisely how to reset Nest Camera and restore it to its full potential.
Key Takeaways
- Access the Google Home app to remove the device
- Locate the reset button at the bottom of the camera
- Press and hold the button for about 12 seconds to reset the camera
Before you start, there is a difference between a restart and a reset that you really need to know about.
| Restart: | Reset: |
| This action retains all your configurations while ensuring that the device reconnects to the same Wi-Fi network. It proves useful when the device experiences a freeze, struggles with internet connectivity, or exhibits abnormal behavior. | This procedure wipes out all your customized settings, erases the entire video history, and reverts the device to its factory default settings. It does not automatically reestablish Wi-Fi connectivity, necessitating the need to reconfigure the device. |
How to Reset Nest Camera Step by Step

To perform a factory reset on your Google Nest camera, you need to access the Google Home app on your phone. Whether you have an Android or iOS device, the Google Home app can be downloaded from the respective app store.
Once you have downloaded the app, open it and find the tile for your camera. Tap on the tile to open the camera page, and then tap on the settings icon located in the top right corner of the page.
From the settings menu, select “Remove device” and confirm that you want to remove the camera from your account. This will prepare the camera for the factory reset process.
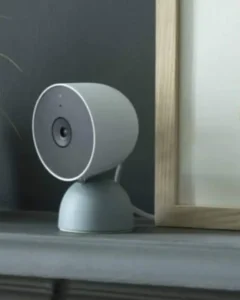
After removing the camera from your account, detach it from the magnetic plate and locate the reset button at the bottom of the camera. Press and hold the reset button for approximately 12 to 15 seconds until the camera’s light turns off.
After resetting your Google Nest camera, you need to confirm that the camera has been successfully reset. To do this, you should attach the camera back to its magnetic plate and check if there is no light on the camera. If there is no light, it indicates that the camera has been successfully factory reset.
If you want to see the process as a video I can recommend this one
Contact Nest Support

If you’ve tried all the troubleshooting tips above and are still having issues resetting your Nest camera, it’s time to contact Google Nest support. They can help you troubleshoot and resolve the issue, ensuring that your Nest camera is reset and working correctly.
FAQ
How to do hard reset on Nest camera?
To do a hard reset on a Nest camera, you can unplug the camera from the power source, wait for 10 seconds, and plug it back in. Alternatively, you can locate the reset hole on the bottom of the camera head and use a paperclip to press and hold it for about 10 seconds.
Why is my nest cam not connecting to Wi-Fi?
A Nest camera may not be connecting to Wi-Fi due to a weak or unstable Wi-Fi signal, incorrect Wi-Fi password, or network interference. Other possible causes include outdated camera firmware, wrong Wi-Fi network selected during setup, or a faulty camera.
How do I get my Google Nest camera back online?
To get a Google Nest camera back online, check the camera’s power source, Wi-Fi signal strength, and make sure the camera is within range of the Wi-Fi router. If the camera is still not connecting, try restarting the camera or resetting it to its factory settings
If you liked this blog article about the topic: How to Reset Nest Camera, don’t forget to leave us a comment down below to tell us about your experience.
Feel free to also check out our other Articles from the category “Home Tech & Security“

")